Now you have just installed AutoCount Accounting. A shortcut icon is created on your desktop.

Double click on the shortcut icon,
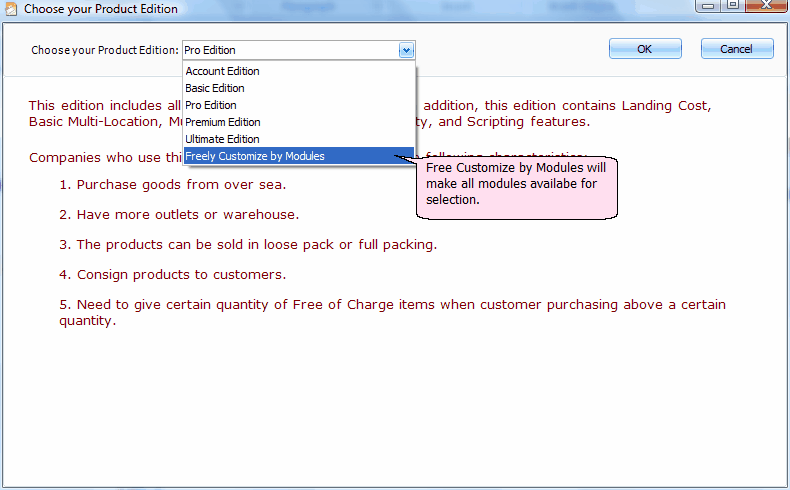
A windows is prompted asking you to choose your product edition. Choose the edition that you have purchased. Each edition will have its range of modules activated when you login later.
(refer to Product Specification for comparison of different editions.)
If you are trying out the software, choose Freely Customize By Modules so that later you may choose to activate any combination of the modules.
Click on OK.
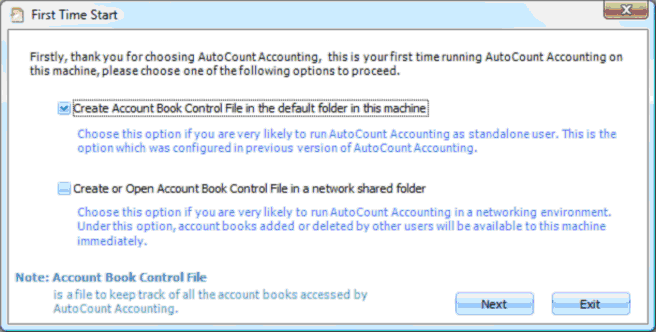
Account Book Control File is a file that provides information about account books and their server (it tells the system where to get the account books).
Create Account Book Control File in the default folder in this machine: this option is for standalone user to create the control file on its own machine. The default folder of Account Book Control File (A2006.dmf) will be created at:
C:\ProgramData\AutoCount\Accounting (for Windows Vista), or
C:\Documents and Setting\All users\Application Data\ (for Windows XP).
Create or Open Account Book Control File in A Network Shared Folder: in network environment, it is not necessary for every workstation to create and maintain the Account Book Control File, it is usually maintained by the database server and shared out to everybody. If you are the server, choose this option and create the control file in a shared folder. If you are the client, open (link) to the Control File in a shared folder.
The control file is not a database file, it is just an agent directing to database file. Choose this option if you know the path of existing control file.
Also refer to:
Show Current Account Book Control File Full Path
Open Account Book Control File
Save To New Account Book Control File
Select the first option and click on Next,
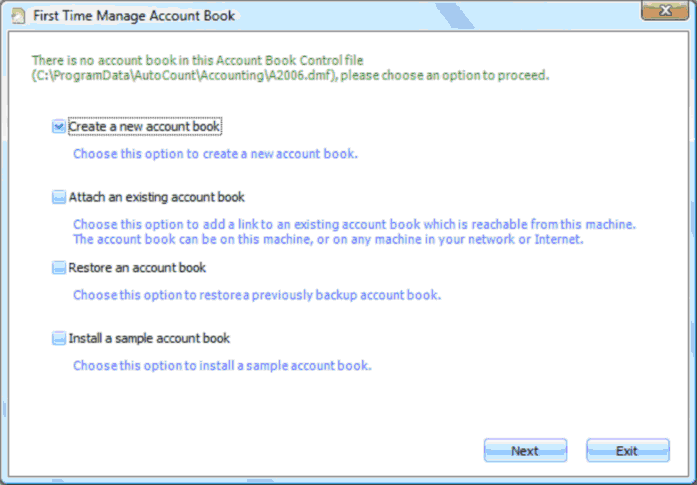
Create a new account book: create a new account book means create a new database (empty) for a new set of account. (also see the same steps at Create Account Book.)
Attach an existing account book: this means to link to an existing account book either stored in this machine or other machine in a network / internet. (refer to Attach Account Book.)
Restore an account book: this means to create a new account book by restoring data from a backup file. (refer to Restore)
Install A Sample Account Book: this is to create a new account book with sample data. (restoring from sample account book with transaction data.) Refer to: Install Sample Account Book..
In my case, I choose Create a new account book, and click on Next;
The windows of Create Account Book Wizard will be displayed:
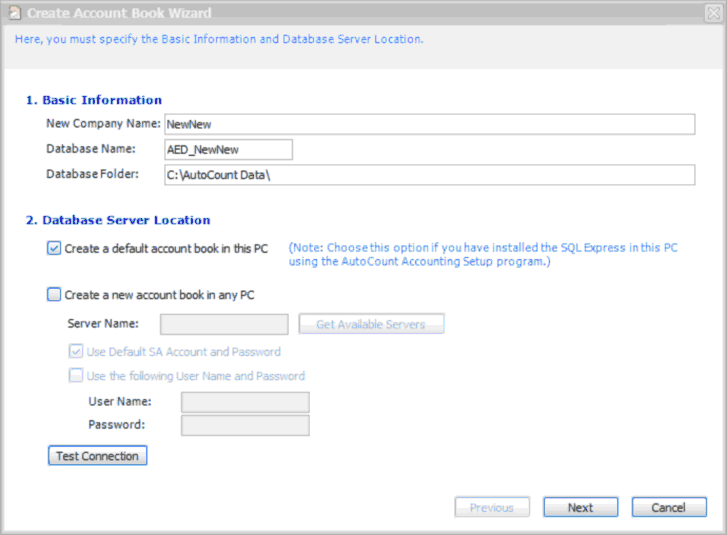
1. Basic Information
New Company Name: key in the company name for the new account book (database).
Database Name: by default, the system will assign a initial name "AED_" followed by the first word of the company name. You may change the assigned database name as you wish.
Database Folder: the default database folder path is "C:/AutoCount Data". You may change the drive but it's advisable to keep the folder name 'AutoCount Data'.
2. Database Server Location
Create a default account book in this PC: select this option if this is a 'standalone' case, or if this PC is installed with SQL Server and you wish to create the new database folder in this PC. (Note: choosing this option will not restrict you from accessing other account books which were created at other machines. To access to those account books, we use Attach Account Book.)
Create a new account book in any PC: select this option if you would like the account book to be stored at any network machine (a database server), including local machine..
Server Name: key in the PC name of the server, or click on Get Available Server to select the server name (e.g. Peter-PC\A2006). You may also choose or key in the server name of your local machine, e.g. (local)\A2006.
Use Default SA Account and Password: this is to used the default setting set by AutoCount so that you don't have to create/remember the password. By default this option is selected, and it is recommended to keep it.
Use The Following User Name and Password: this option is meant for advanced users that do not want to use the defaulted SA Account and Password.
Test Connection: click on this to test the connection with SQL Server. Message will be prompted should the connection is successful / failed.
Click on Next to proceed:
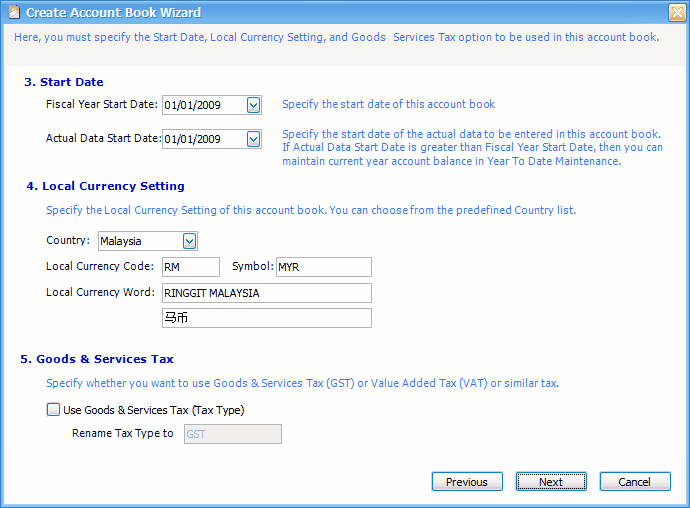
3. Start Date
Fiscal Year Start Date: assign the first day (start day) of the financial year.
Actual Data Start Date: assign the start day where this Account Book is to be used to generate actual data. This date will determine the opening balances (of the first time) of this account book. There are 2 possibilities: (a) the Actual Data Start Date is the same as Fiscal Year Start Date, which the opening balances will be the same as the closing balances of the last accounting year; (b) the Actual Data Start Date is later than Fiscal Year Start Date, in which the opening balances will be the closing balances of its previous month.
4. Local Currency Setting: specify the local currency of this account book.
5. Goods & Services Tax: (if applicable) check the checkbox if GST is applicable.
Click on Next to proceed:
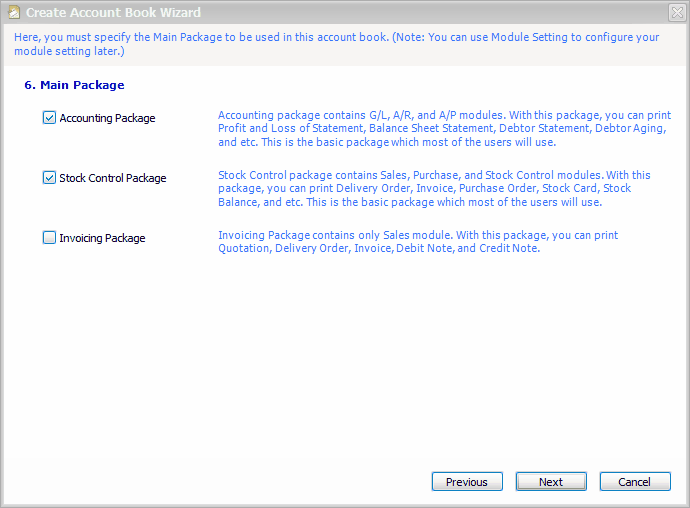
6. Main Package: select the package of your license. It is either one of the packages or a combination of 2 packages. If you are not sure about the packages, check the check-boxes of Accounting and Stock Control. This option is just the initial setting, the actual accessible modules are controlled by the license code or USB key.
Click on Next to proceed:
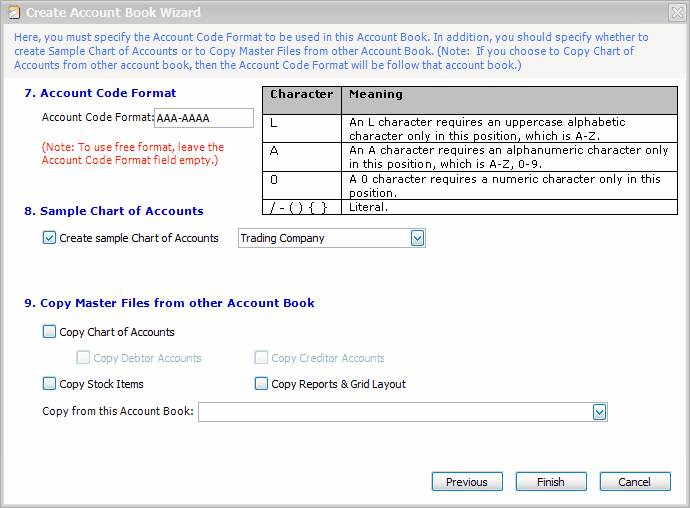
7. Account Code Format: by using the defined characters, set the account code format for this account book. The maximum number of characters allowed is 12. By default, the code format is set to "AAA-AAAA". You may also opt for free format by emptying the format field. Some examples of format are: 0000/000, AA-AAA-AAAA, LL-AAAA/000 ...
8. Sample Chart of Account: you may select to create sample chart of account for this new account book, or uncheck the checkbox if you do not wish to create sample chart of account. (Note: make sure you select this option if you have selected Invoicing Package in step 6.)
9. Copy Master Files From Other Account Book: you may copy (import) few master files from an existing account book.
Click on Finish.
A message will be prompted indicating that the account book is being created successfully.
Click on OK.
The AutoCount Accounting Login screen will be displayed;
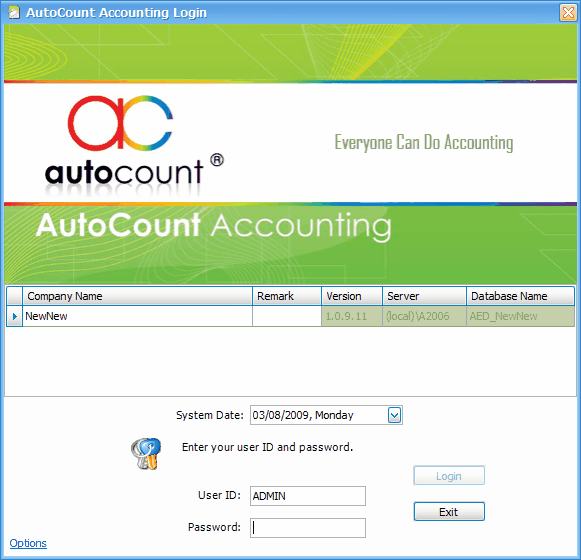
Now you may login to your newly created/attached/restored account book.
(you may also click on Options for more settings related to login screen.)
Use the User ID and Password: ADMIN

This message is prompted when the system detected any fixes needed for your account book.
Click on OK to proceed.

Click on OK.
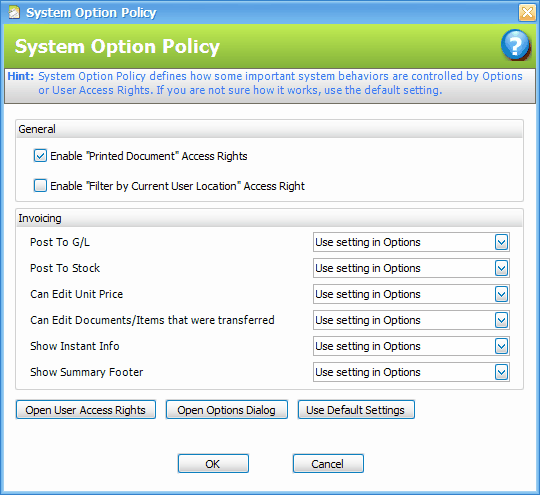
You may just ignore this page if you are new to this software. Just click on OK to proceed.
(Refer to: System Option Policy.)
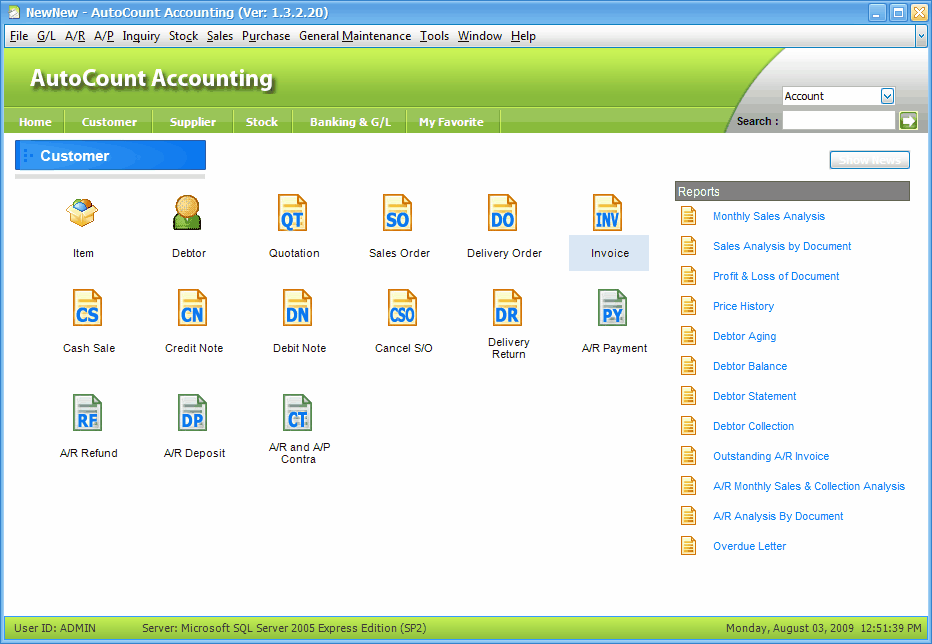
Welcome to the main screen of AutoCount Accounting!
_____________________________________________________________
Send feedback about this topic to AutoCount. peter@autocountSoft.com
© 2013 Auto Count Sdn Bhd - Peter Tan. All rights reserved.