This is to create, edit or print sales credit note.
Sales Credit Note is used when there was a goods return (involved physical stock movement) or change in item price, otherwise (if it involves only a change in total amount) use A/R Credit Note instead.
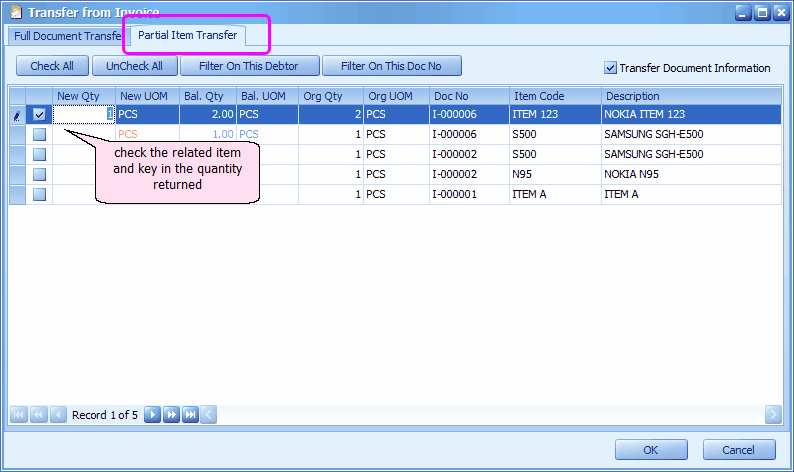
Sales Credit Note must transfer from Sales Invoice.
To Create New Credit Note
Go to Sales > Credit Note
Click on Create A New Credit Note
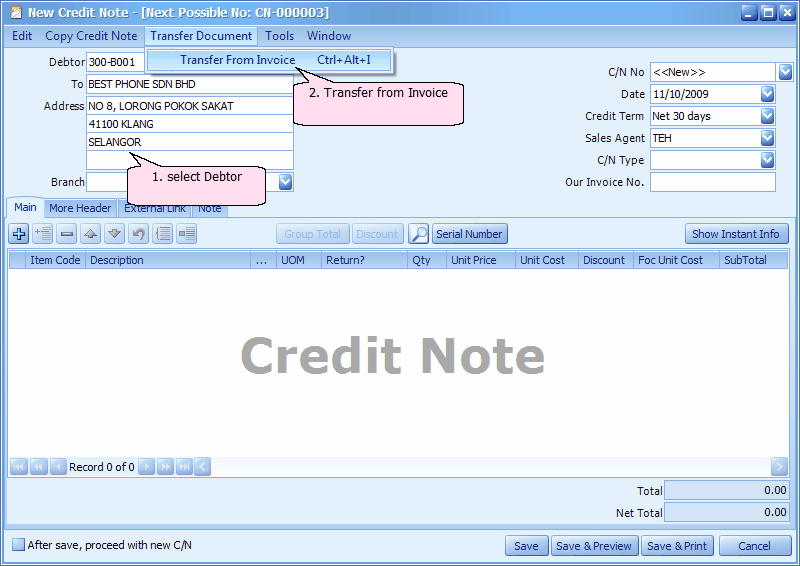
Debtor: key in the first number/alphabet, OR click on the drop down arrow button, OR click on Search button to assign/select a debtor number.
Branch: specify the branch of this debtor (if any)
To/Address: the info will be displayed according to selected debtor code.
C/N No: <<new>> means to follow auto-running numbering (maintained at Document Numbering Format Maintenance), and the next possible number is displayed at the top bar of the window. You may click on it to key in any number you like.
Date: system/computer date is automatically captured, you may click to change.
Credit Terms: the default credit terms of this debtor will be displayed.
Sales Agent: assign a sales agent (if any). The default Sales Agent can be assigned in Debtor Maintenance.
C/N Type: select the credit note type (maintained at C/N Type Maintenance )
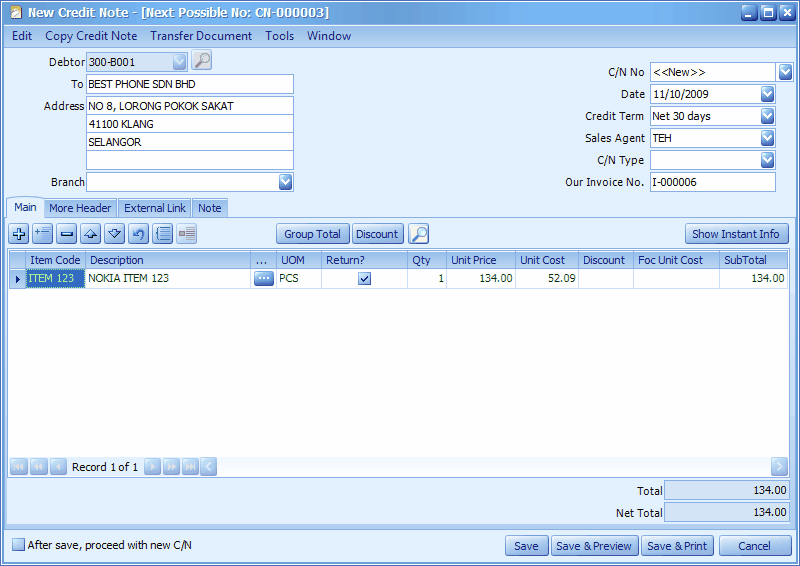
Our Invoice No: the related invoice number will be filled automatically.
Main tab: details of transaction
More Header tab: to provide additional information of the document, customer and delivery.
External Link tab: allows to maintain cross reference links in other formats, such as Excel, Word documents, Image files...
Note tab: here you may type in additional notes.
Functional Buttons:
![]() to add / insert a detail row. (Insert)
to add / insert a detail row. (Insert)
![]() to insert a detail row before the highlighted row. (Ctrl + Insert)
to insert a detail row before the highlighted row. (Ctrl + Insert)
![]() to delete highlighted row. (Ctrl + Delete)
to delete highlighted row. (Ctrl + Delete)
![]() to move the detail row up/down. (Alt + Shift + Up/Down)
to move the detail row up/down. (Alt + Shift + Up/Down)
![]() undo (Ctrl + Z)
undo (Ctrl + Z)
![]() to select all detail rows (Ctrl + Alt + A), so that it can be deleted or modified in one shot (using Range Set)
to select all detail rows (Ctrl + Alt + A), so that it can be deleted or modified in one shot (using Range Set)
![]() range set (F12)... a range setting windows will be prompted. This is usually used to apply changes to several/all selected detail rows.
range set (F12)... a range setting windows will be prompted. This is usually used to apply changes to several/all selected detail rows.
![]() to add a subtotal row, showing the subtotal amount.
to add a subtotal row, showing the subtotal amount.
![]() to add a discount row, and for you to define the group discount by define the percentage % or Value.
to add a discount row, and for you to define the group discount by define the percentage % or Value.
![]() to prompt the item search screen (F9). Type a keyword, select search criteria, click on Search. From the search result, check the check-boxes to select items to be included into the document, then click on OK.
to prompt the item search screen (F9). Type a keyword, select search criteria, click on Search. From the search result, check the check-boxes to select items to be included into the document, then click on OK.
![]() click on this button will display (at bottom section) instant information related to the highlighted item, such as Price History, Stock Balance ...
click on this button will display (at bottom section) instant information related to the highlighted item, such as Price History, Stock Balance ...
Item Code: click on '+' sign to add a new row and select an item; you may key in the first few number/letters of the item code/description and select from the lookup screen.
Description: this is called detail description... will capture the item description automatically (amendable)
Further Description: click to view/edit Further Description of this item. (the default content can be maintained at Stock Item Maintenance)
UOM: the default unit of measurement will be captured;
Return?: check if this is a returned item, the quantity will increase the stock level and the value will post to G/L. If this is unchecked, only the value will be posted to G/L.
Qty: key in the quantity.
Unit Price: the selling price will be captured (either Standard Selling Price or according to the setting in Tools > Options > Invoicing > Auto Price)
Unit Cost: the unit cost value will be displayed
Discount: this is called column discount; you may key in the discount for any particular detail row. The discount could be a value (e.g. 5, 5.5, 10... ), a percentage (e.g. 5%, 5.5%, 10%), or a multi-level discount (e.g. 5+5.5, 5+5%, 5%+5%, 10%+5, 5%+5%+10, .... )
SubTotal: this is the line total (net)
Total: this is bill total before footer discount and tax.
Net Total: this is bill total after footer discount and tax.
After save, proceed with new C/N: when this is checked, a fresh screen will be ready for new document upon Save; if unchecked will exit the transaction screen upon Save.
(You may go to Edit menu to copy/paste the whole document or highlighted details to/from clipboard; you may also save the entries to K.I.V. folder; you may decide whether or not to post this document to Stock and post to G/L.)
(You may go to Copy Credit Note menu to Copy From/To other/new document.)
(You may go to Transfer Document menu to transfer from invoice)
(You may go to Tools menu to make use of Data Entry by Past Sales Record, and Refresh Account No.)
(also refer to Common Function in Transaction Screen)
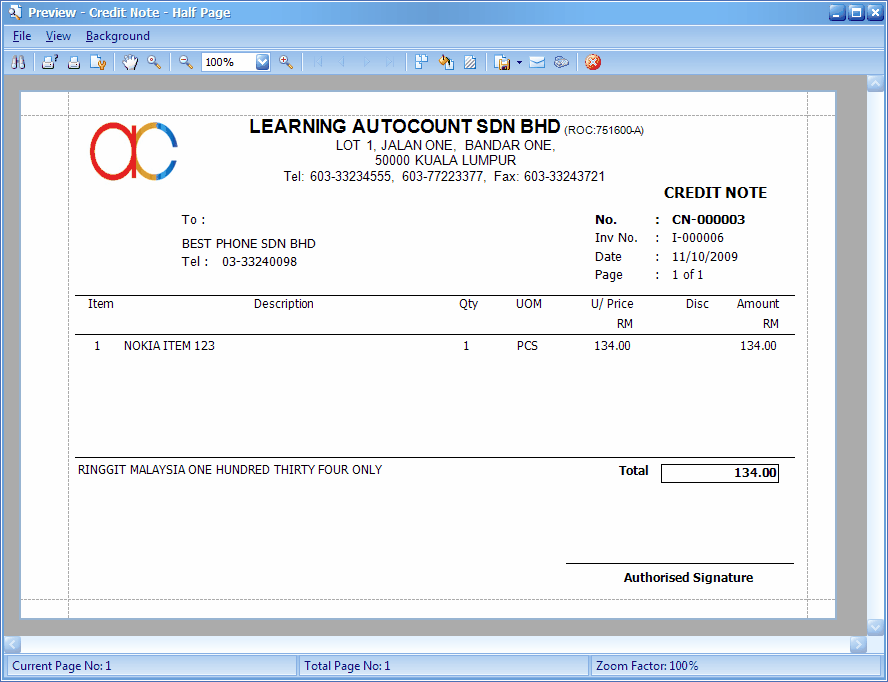
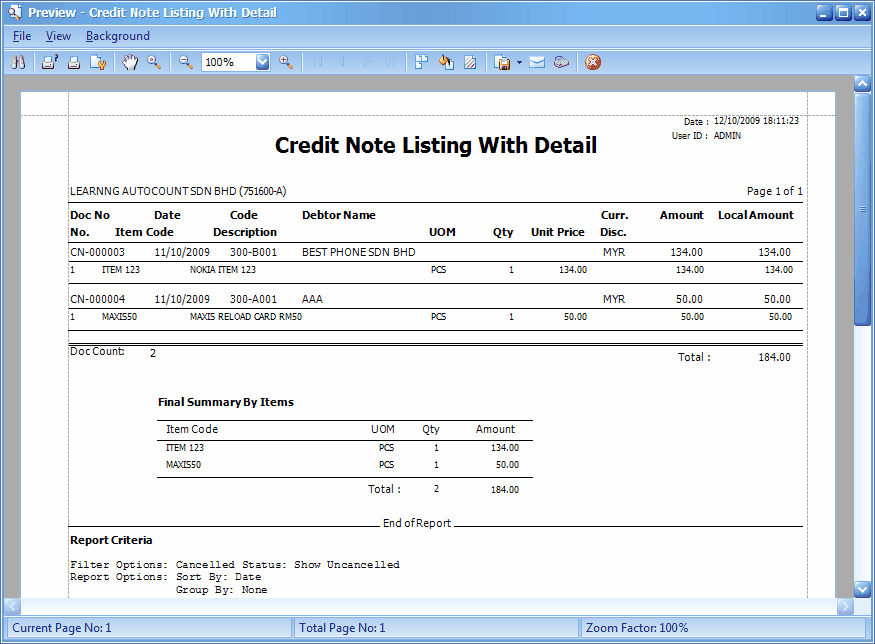
Click on Save & Preview,

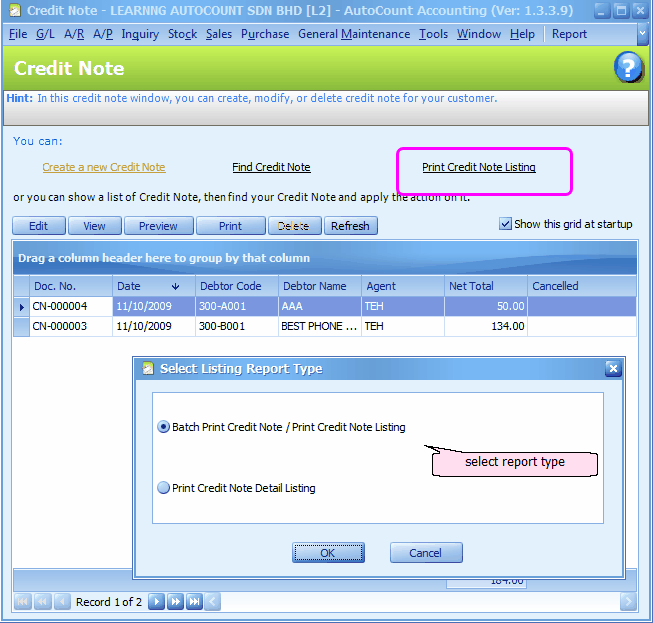
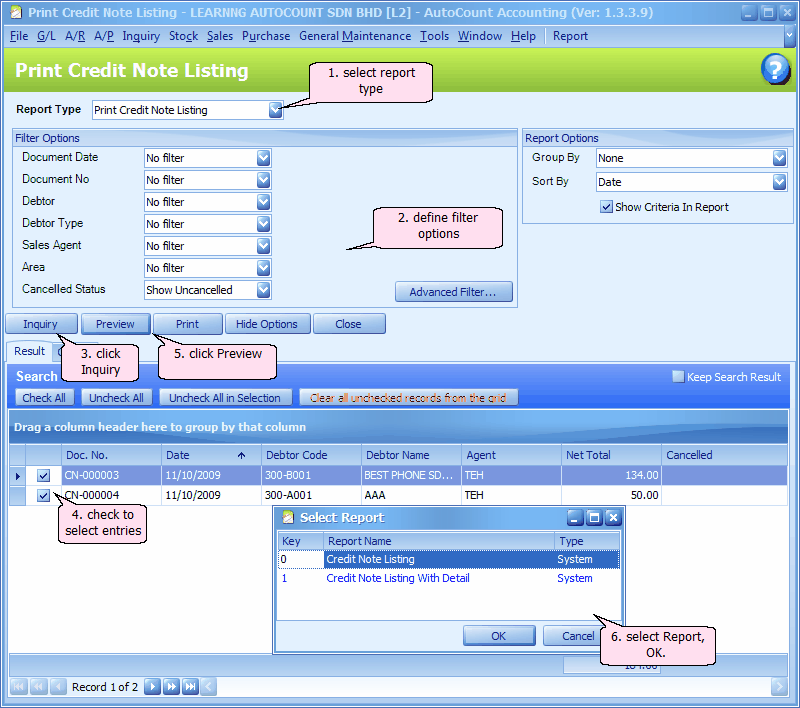
Print Credit Note Listing
New: (from version 1.3.5.08 onwards)
Click on the shortcut label of Credit Note or go to Sales > Credit Note, click on Others menu...
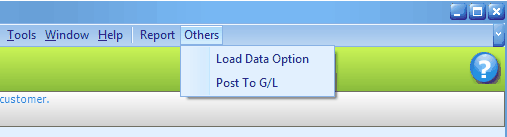
Load Data Option: to specify the number of recent days when loading data instead of to load all data, so that the loading speed can be further improved. See 13508 Load Data Option for more details.
Post To G/L: to post several document at one go. See 13508 Post To G/L For Several Documents for more details.
Related topic: 15040 Our Invoice No. in Listings
_____________________________________________________________
Send feedback about this topic to AutoCount. peter@autocountSoft.com
© 2013 Auto Count Sdn Bhd - Peter Tan. All rights reserved.